 How to import data
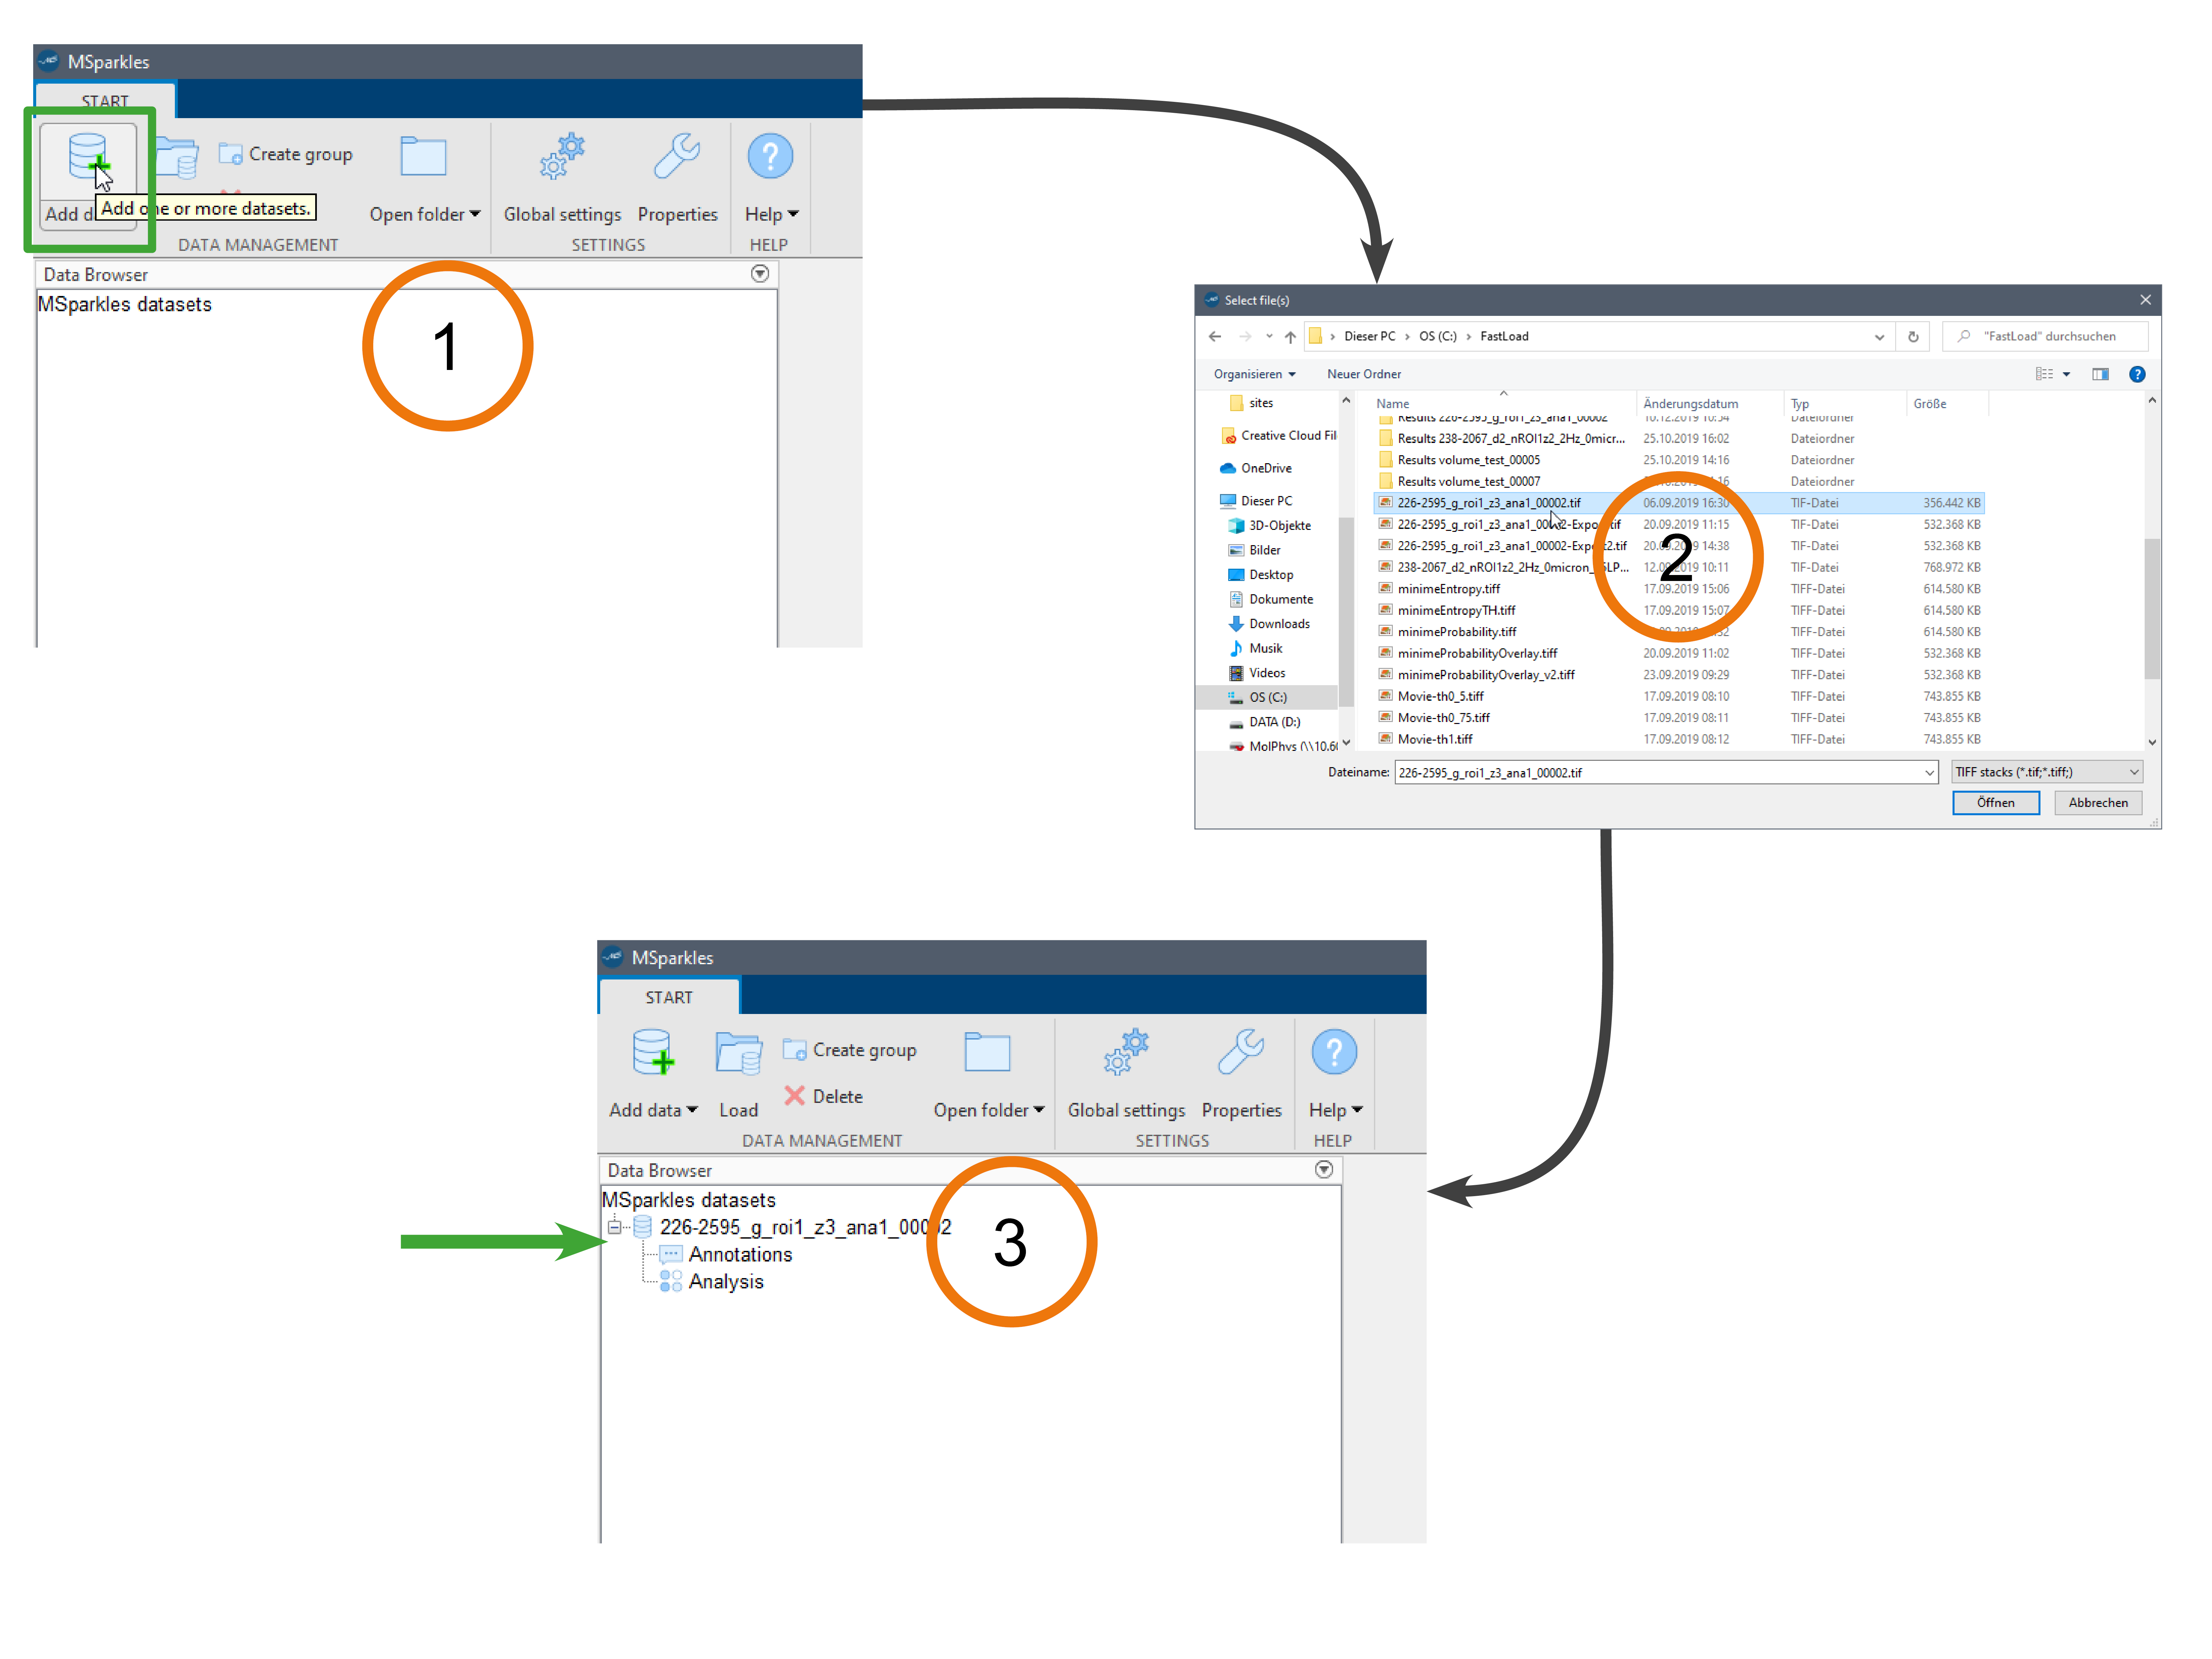
To import an image stack (in MSParkles, image stacks are called datasets), click the "Add data" button in the top-left corner of MSparkles' main menu. In the upcomming file selection dialog, select one or more TIFF stacks you want to import and click "Open". MSparkles will now add all selected files to the project manager on the left side of its main window, and import each stack's meta data.
Tip: Create folder groups and organize your data in logical folders e.g. "Experiment XYZ", "Control" or "Knockout XYZ". To Add a dataset to a folder group, simply select the destination folder before clicking "Add data".
Info: MSparkles saves a file for each dataset in your "Documents" folder on your computer in a sub-folder, called "MSparkles-Projects".
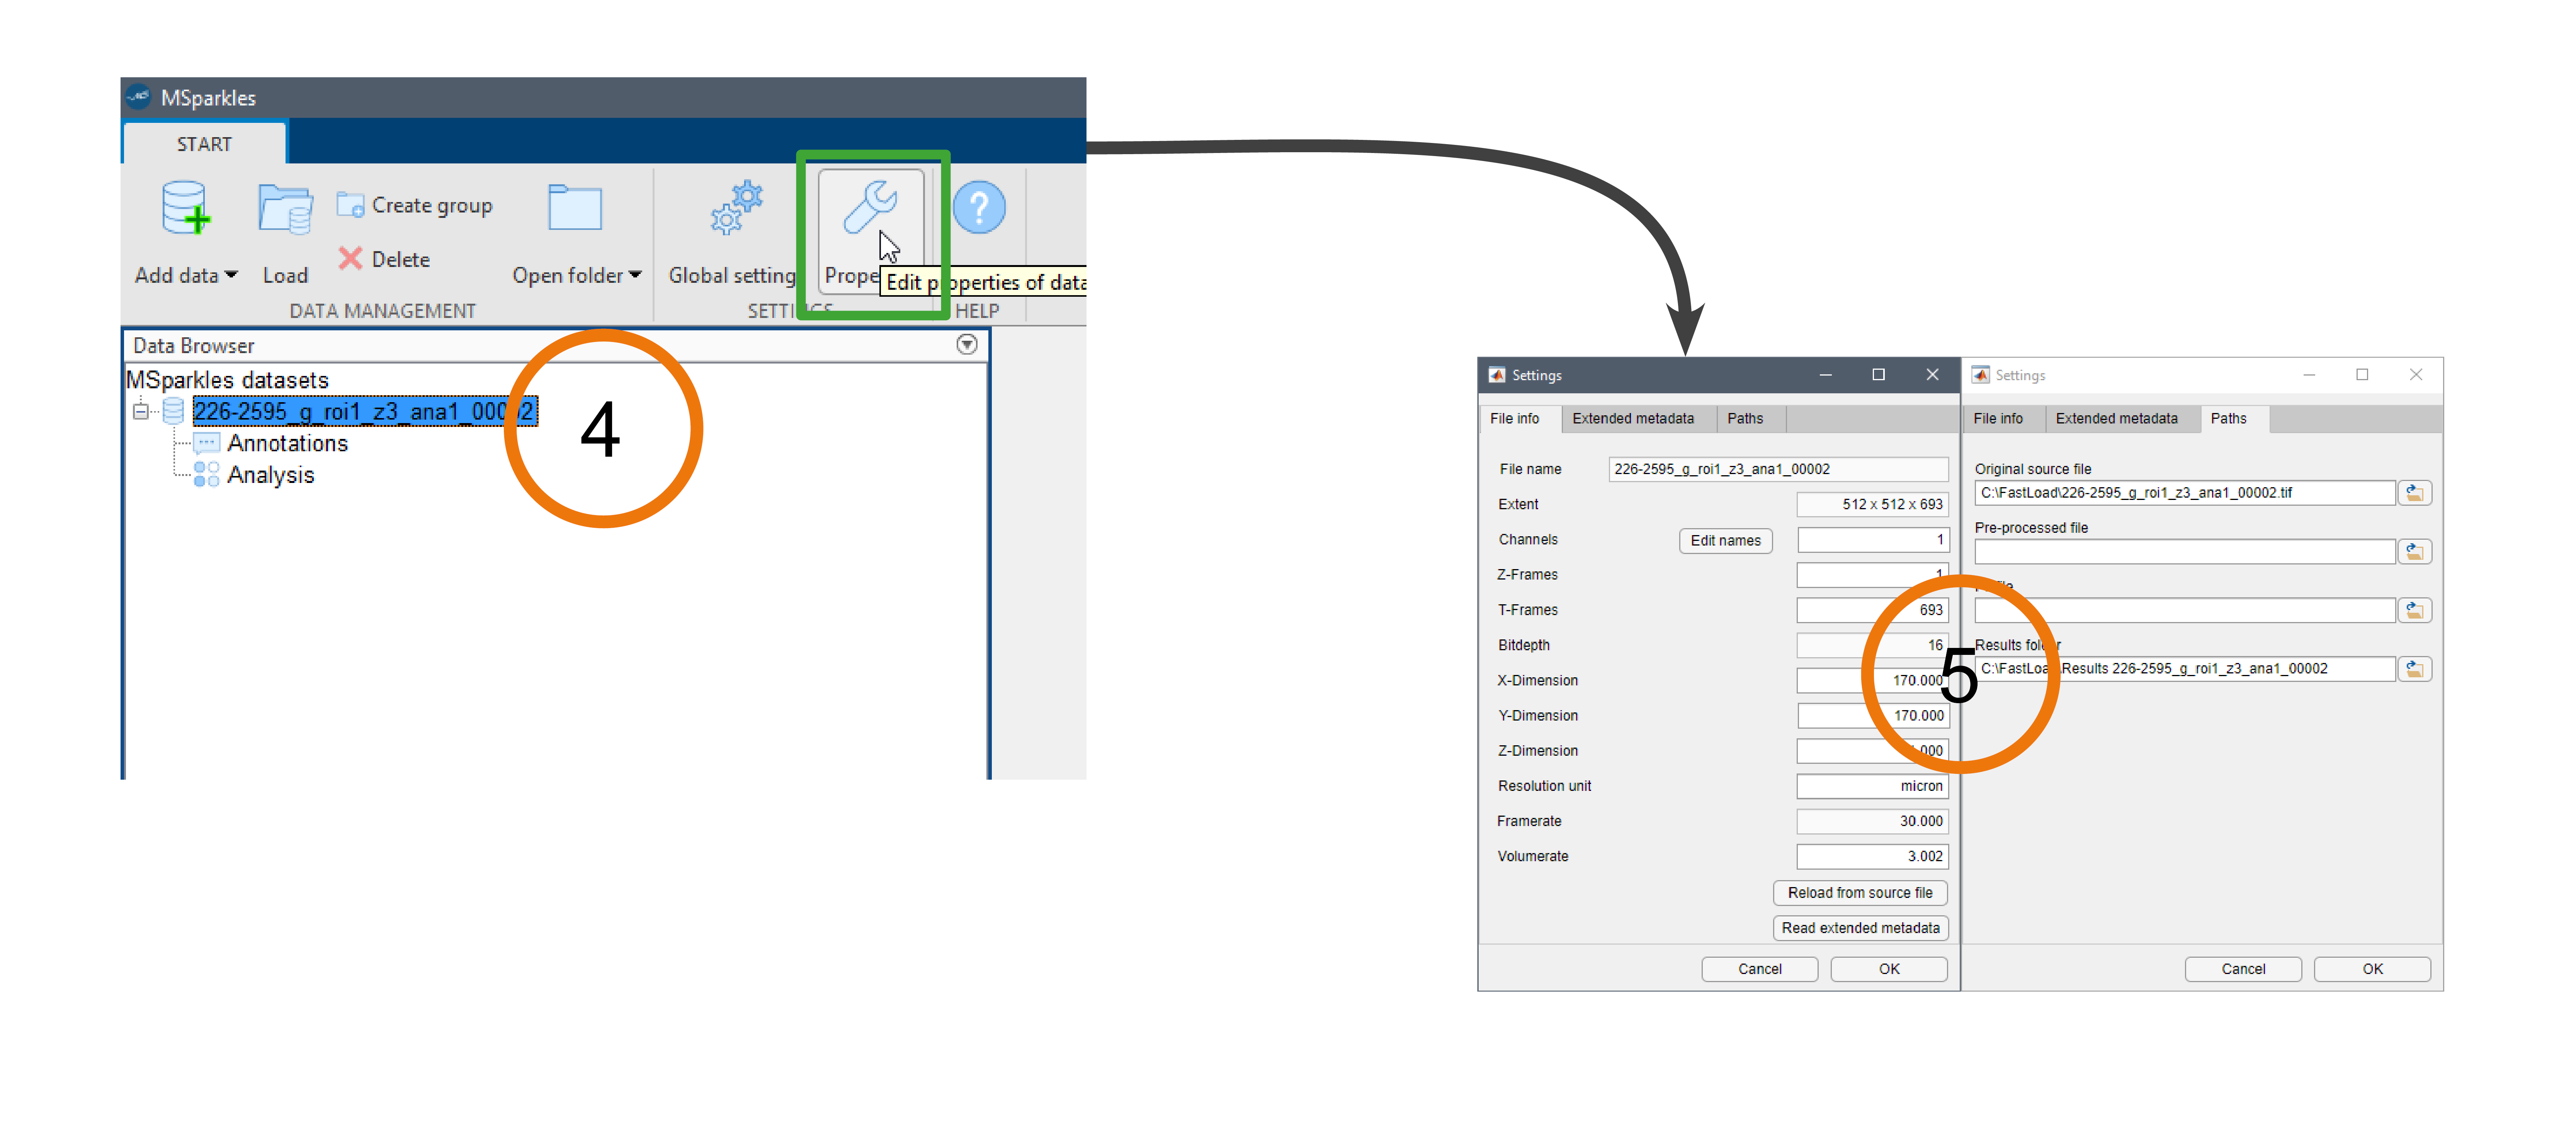
To inspect a dataset's meta data, select the dataset in the project manager and click "Properties" in the main menu. In the upcomming dialog, you can inspect (and to some degree modify) metadata and the associated paths of a dataset, such as the path of the pre-processed image stack, the path of the F0 estimation result and the folder used to save all computation results.
Info: The most important metadata are the dimensional extents of your data (X-Dimension, Y-Dimension, Z-Dimension), which are the physical extent of your field-of-view, the Volume-rate, as this is the effective acquisition rate per volume in Hz. 2D image stacks are treated as "flat volumes", in this case, the volume rate and the frame rate are identical. Finally, the resolution unit (typically micrometer) is important for correct dimensional labeling, e.g. in graphs.
Extended meta data contain information about acquisition parameters saved by ScanImage. These are only additional information, not relevant for computations.
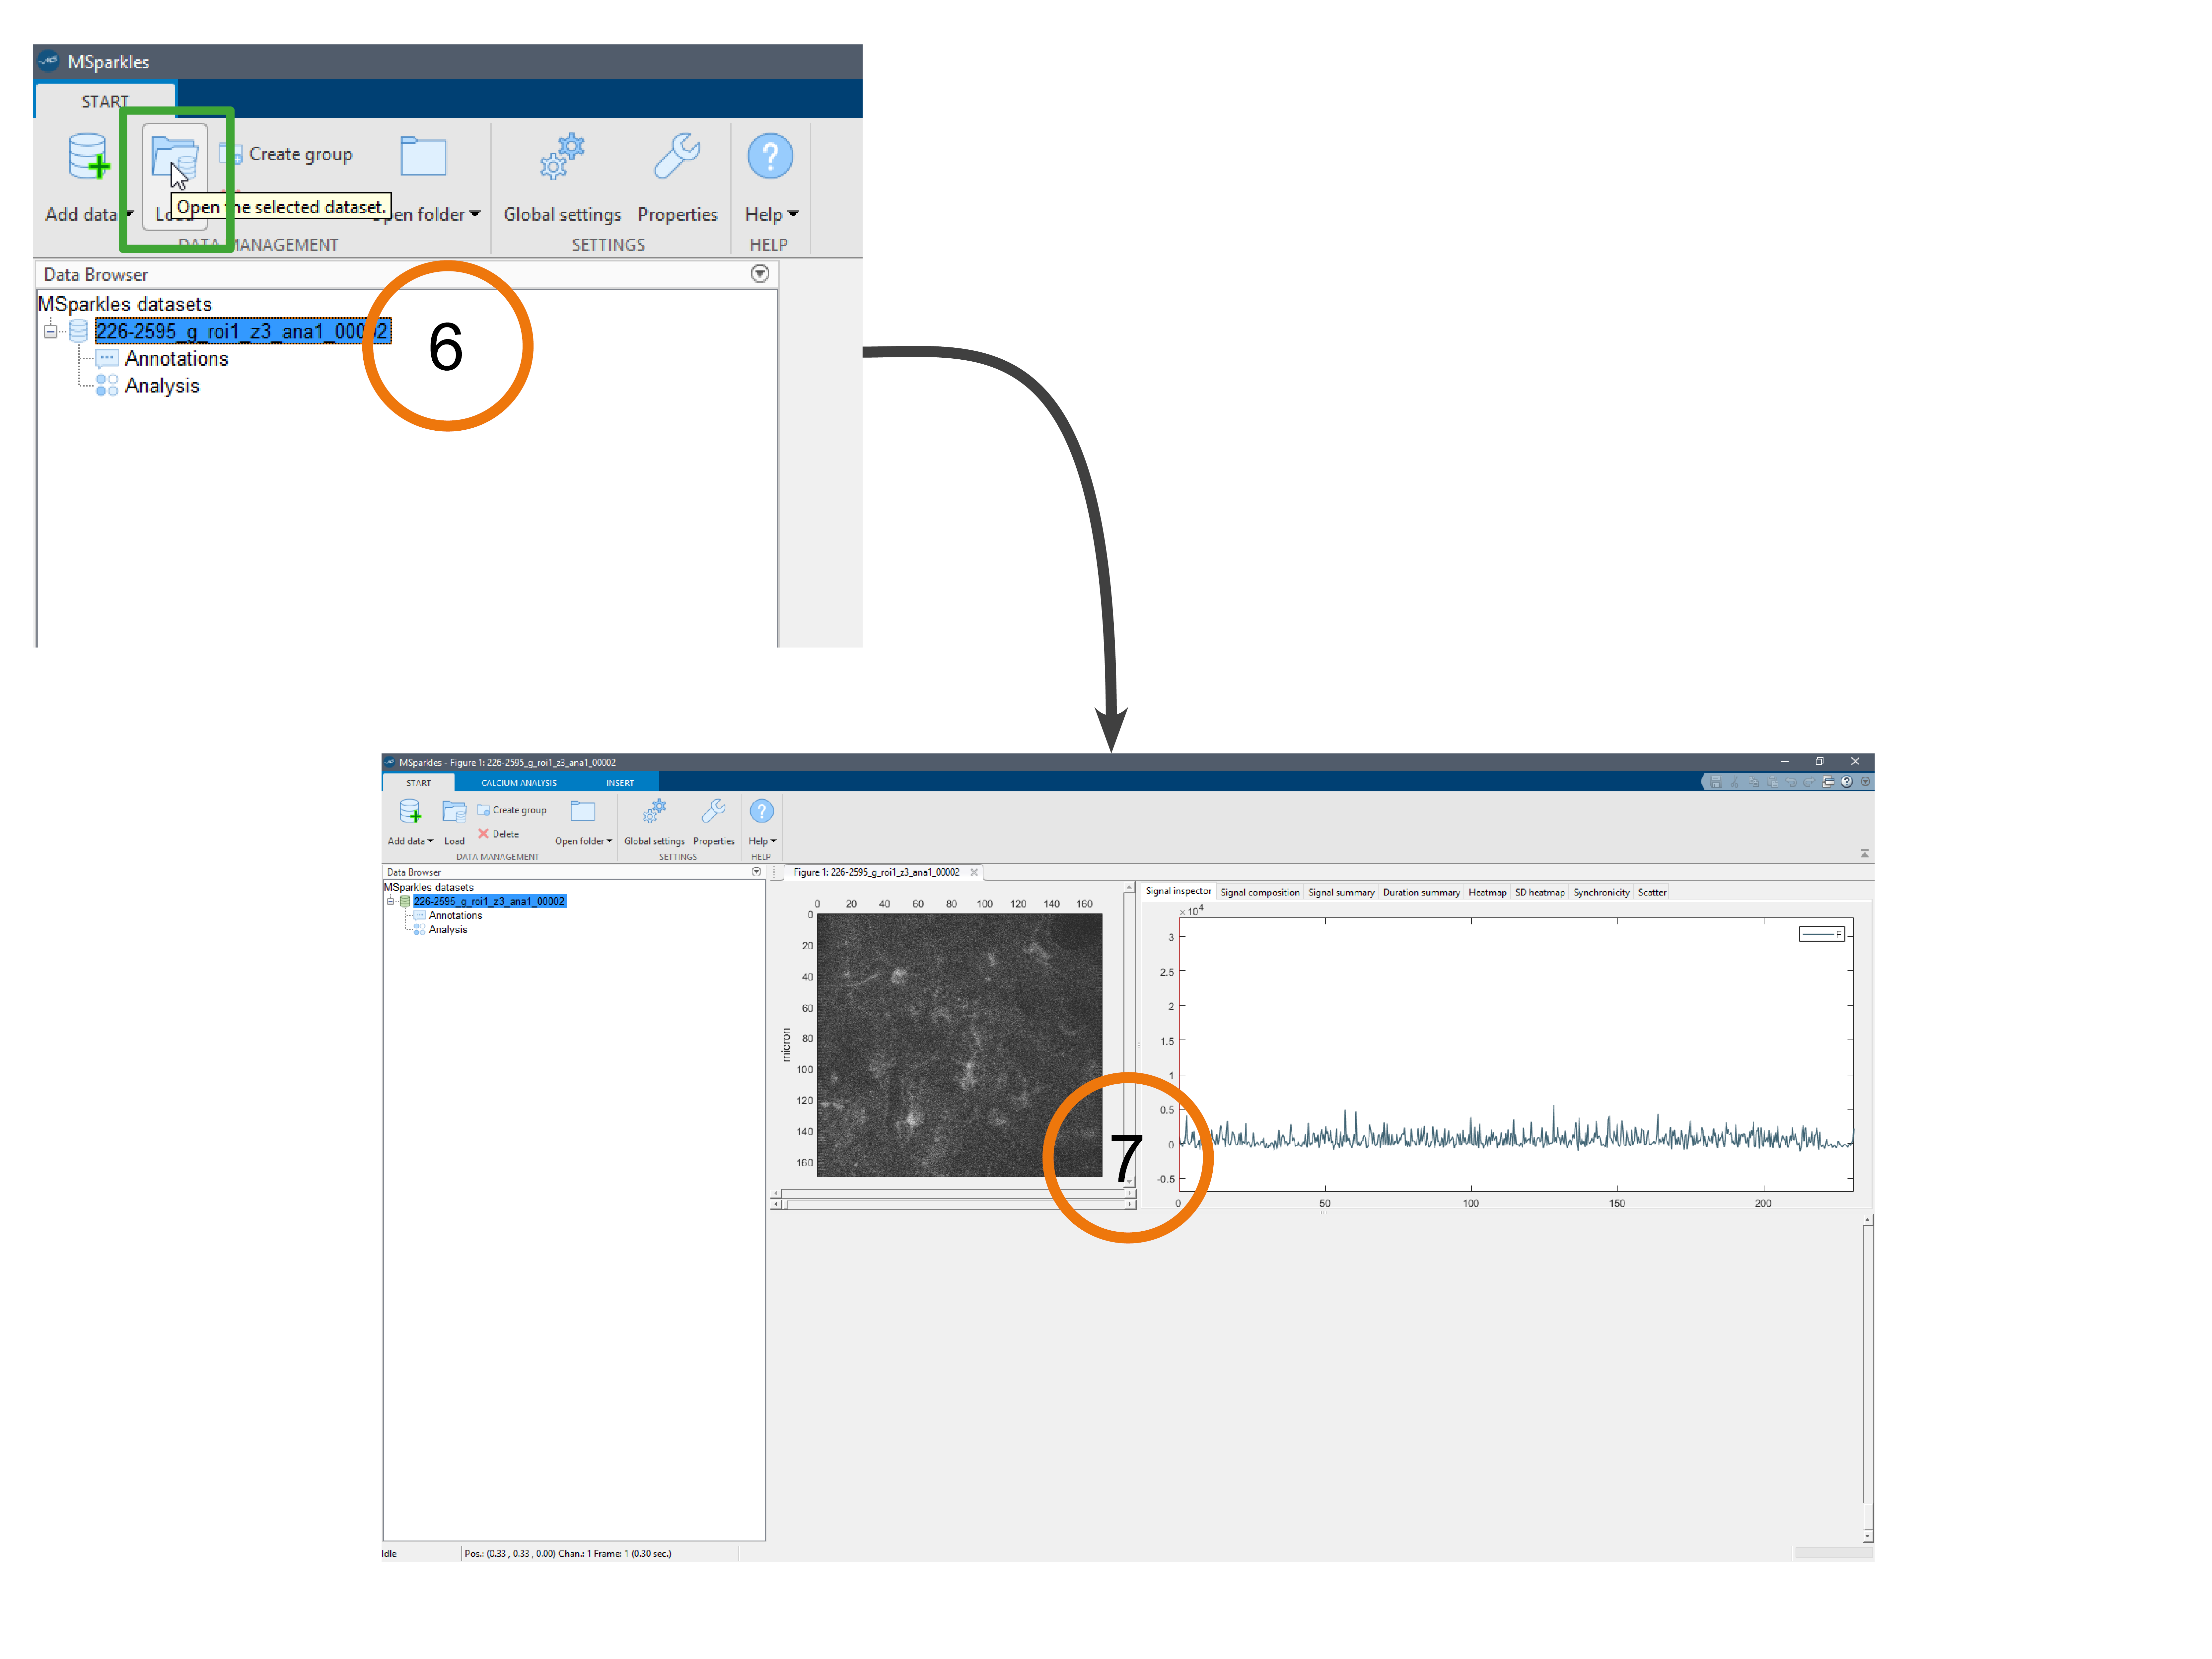
To load a dataset, select it in the project manager and click the "Load" button in MSparkles' main menu. When the dataset is loaded, you can see a preview of the image data and scroll through all its dimensions to inspect your data. You can move the mouse over the preview image and inspect the temporal behaviour of the current pixel under the mouse pointer on the right side of the image preview in the "Signal Inspector".